This post is Part One of a Two-Part Series on leveling up your travel and family photos. Read Part Two here.
Now that it’s officially summer, summer, summertime, many of us will be heading out near and far for some much-needed vacation time. After the difficult past few years of covid, lockdowns, hours of trip planning and rescheduling, record-high gas prices, and more, everyone is really gonna want to capture these special memories we’ve worked so hard to create.
Don’t worry, I’ve got you. This will the first in a two-part series on leveling up your travel and family photos.
This first post will focus on using some simple composition tips to elevate your images and help you capture great travel and family photos not only this summer but all year. And good news, these tips apply to photos of people, places, and things, and you can use them with whatever kind of camera you have.
Composition is simply how the key elements or subjects of a photo are arranged and can be made up of many different elements, or only a few, and the goal is to be visually appealing and hold the viewer’s attention.
When you include a Focal Point or Point of Interest in your composition, this gives the viewer a place for their eyes to rest, and without it, your image may not hold their attention. It also gives your photo meaning and intention. So, when taking a photo, always ask yourself:
How can I draw attention to the main subject?
How can I lead the viewer’s eye into and around the image?
How can I eliminate distracting parts of the scene?
Sometimes finding a good focal point is easy and others times you may need to get creative and really look for an interesting subject. Once you’ve identified a point of interest, you can then build your composition around that focal point to draw attention to it.
Now, with these questions in mind, let’s take a look at 10 important elements and techniques of composition to help improve our photos.
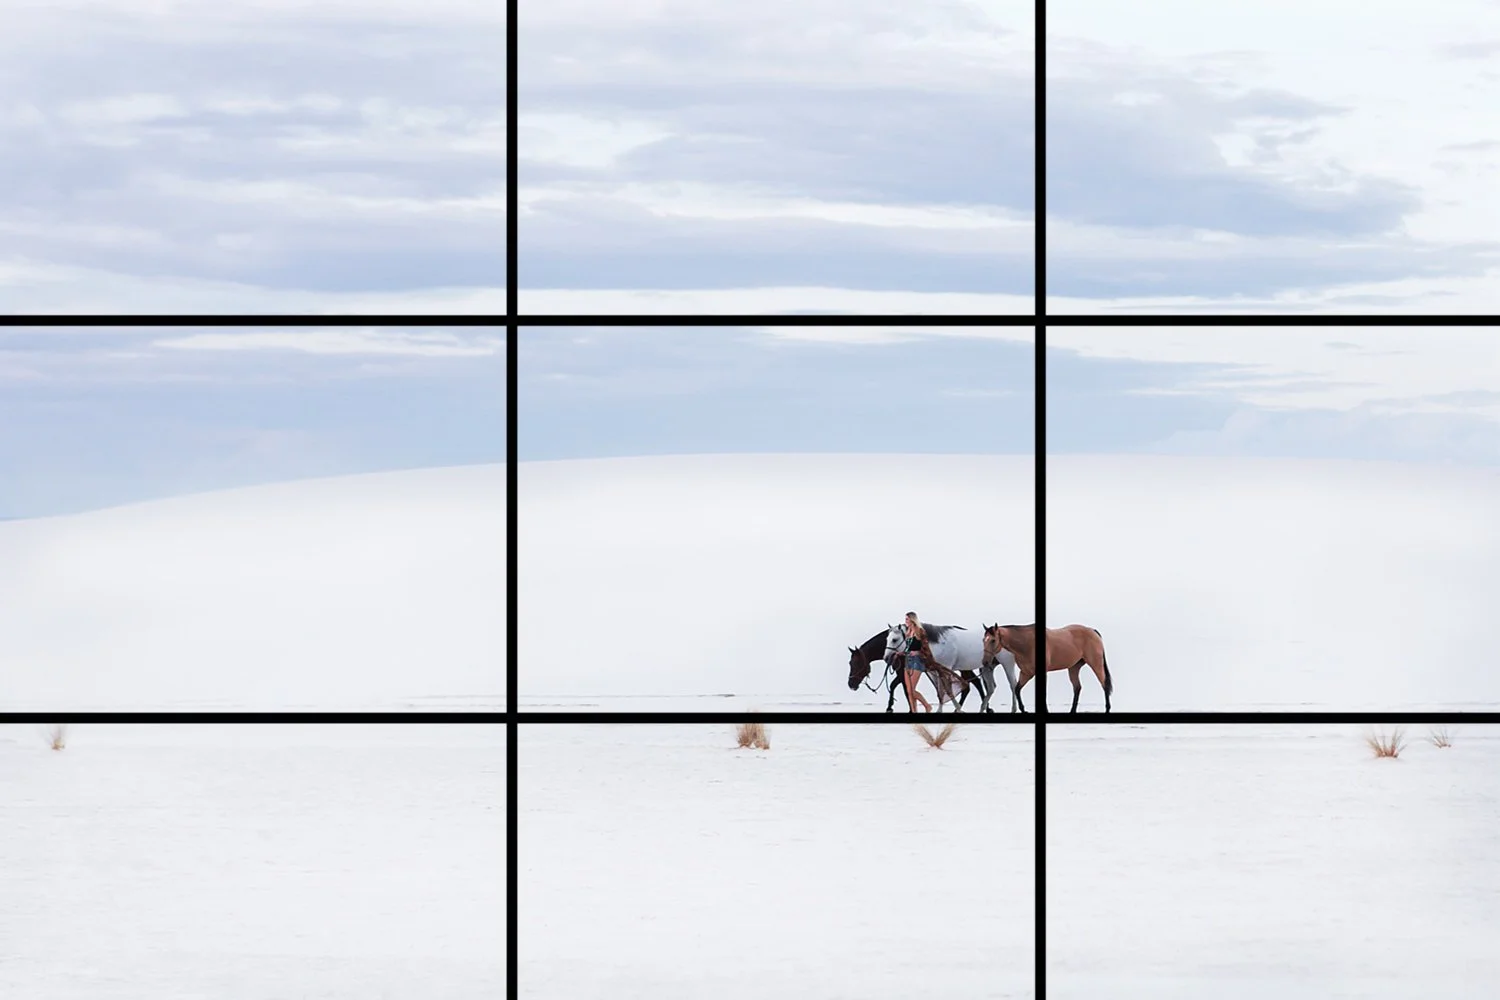
1. RULE OF THIRDS
The Rule of Thirds is all about where you put the main elements or focal points in a scene. Using a common compositional technique that divides the frame into an equal, three-by-three grid with two horizontal lines and two vertical lines that intersect at four points. The rule, which really is just a guideline, suggests that the most powerful and aesthetically pleasing areas of the image are the four points where the lines intersect, and that our eyes are naturally drawn to these areas first.
Many digital cameras and phone cameras have a feature that displays two horizontal and two vertical lines to help with composition.

2. BORDER PATROL
This one is about as simple as they get: before pressing the shutter, make sure to look around the borders of your frame, and your main subject, especially if it’s a person, and make sure there are no unwanted objects invading from the edges.
This means any tree branches, light poles, signs, bright colors or light, or other unsightly objects floating around. These invaders become unwanted distractions, and with them being so close to the edge of your photo, they inevitably pull the eye away from what it's meant to be focusing on. Similarly, check the overall background of your image and reduce clutter that may distract the viewer from the main point of interest.

3. RULE OF ODDS
For whatever reason, using an odd number of subjects can also make the image more interesting and aesthetically pleasing to people. There are many times we can use the Rule of Odds to make our images better, especially with objects. By having one or three elements is better than two. It might not seem like such a big change, but I bet that now I’ve put it in your head you will start to notice it everywhere! And how much more pleasing to the eye it is.

4. LEADING LINES
Using leading lines in your composition is a great way of drawing the eye into the image, and when used correctly, one of the most powerful ways to create an image with a really strong visual impact. Roads, paths, bridges, and rivers are commonly used as leading lines.

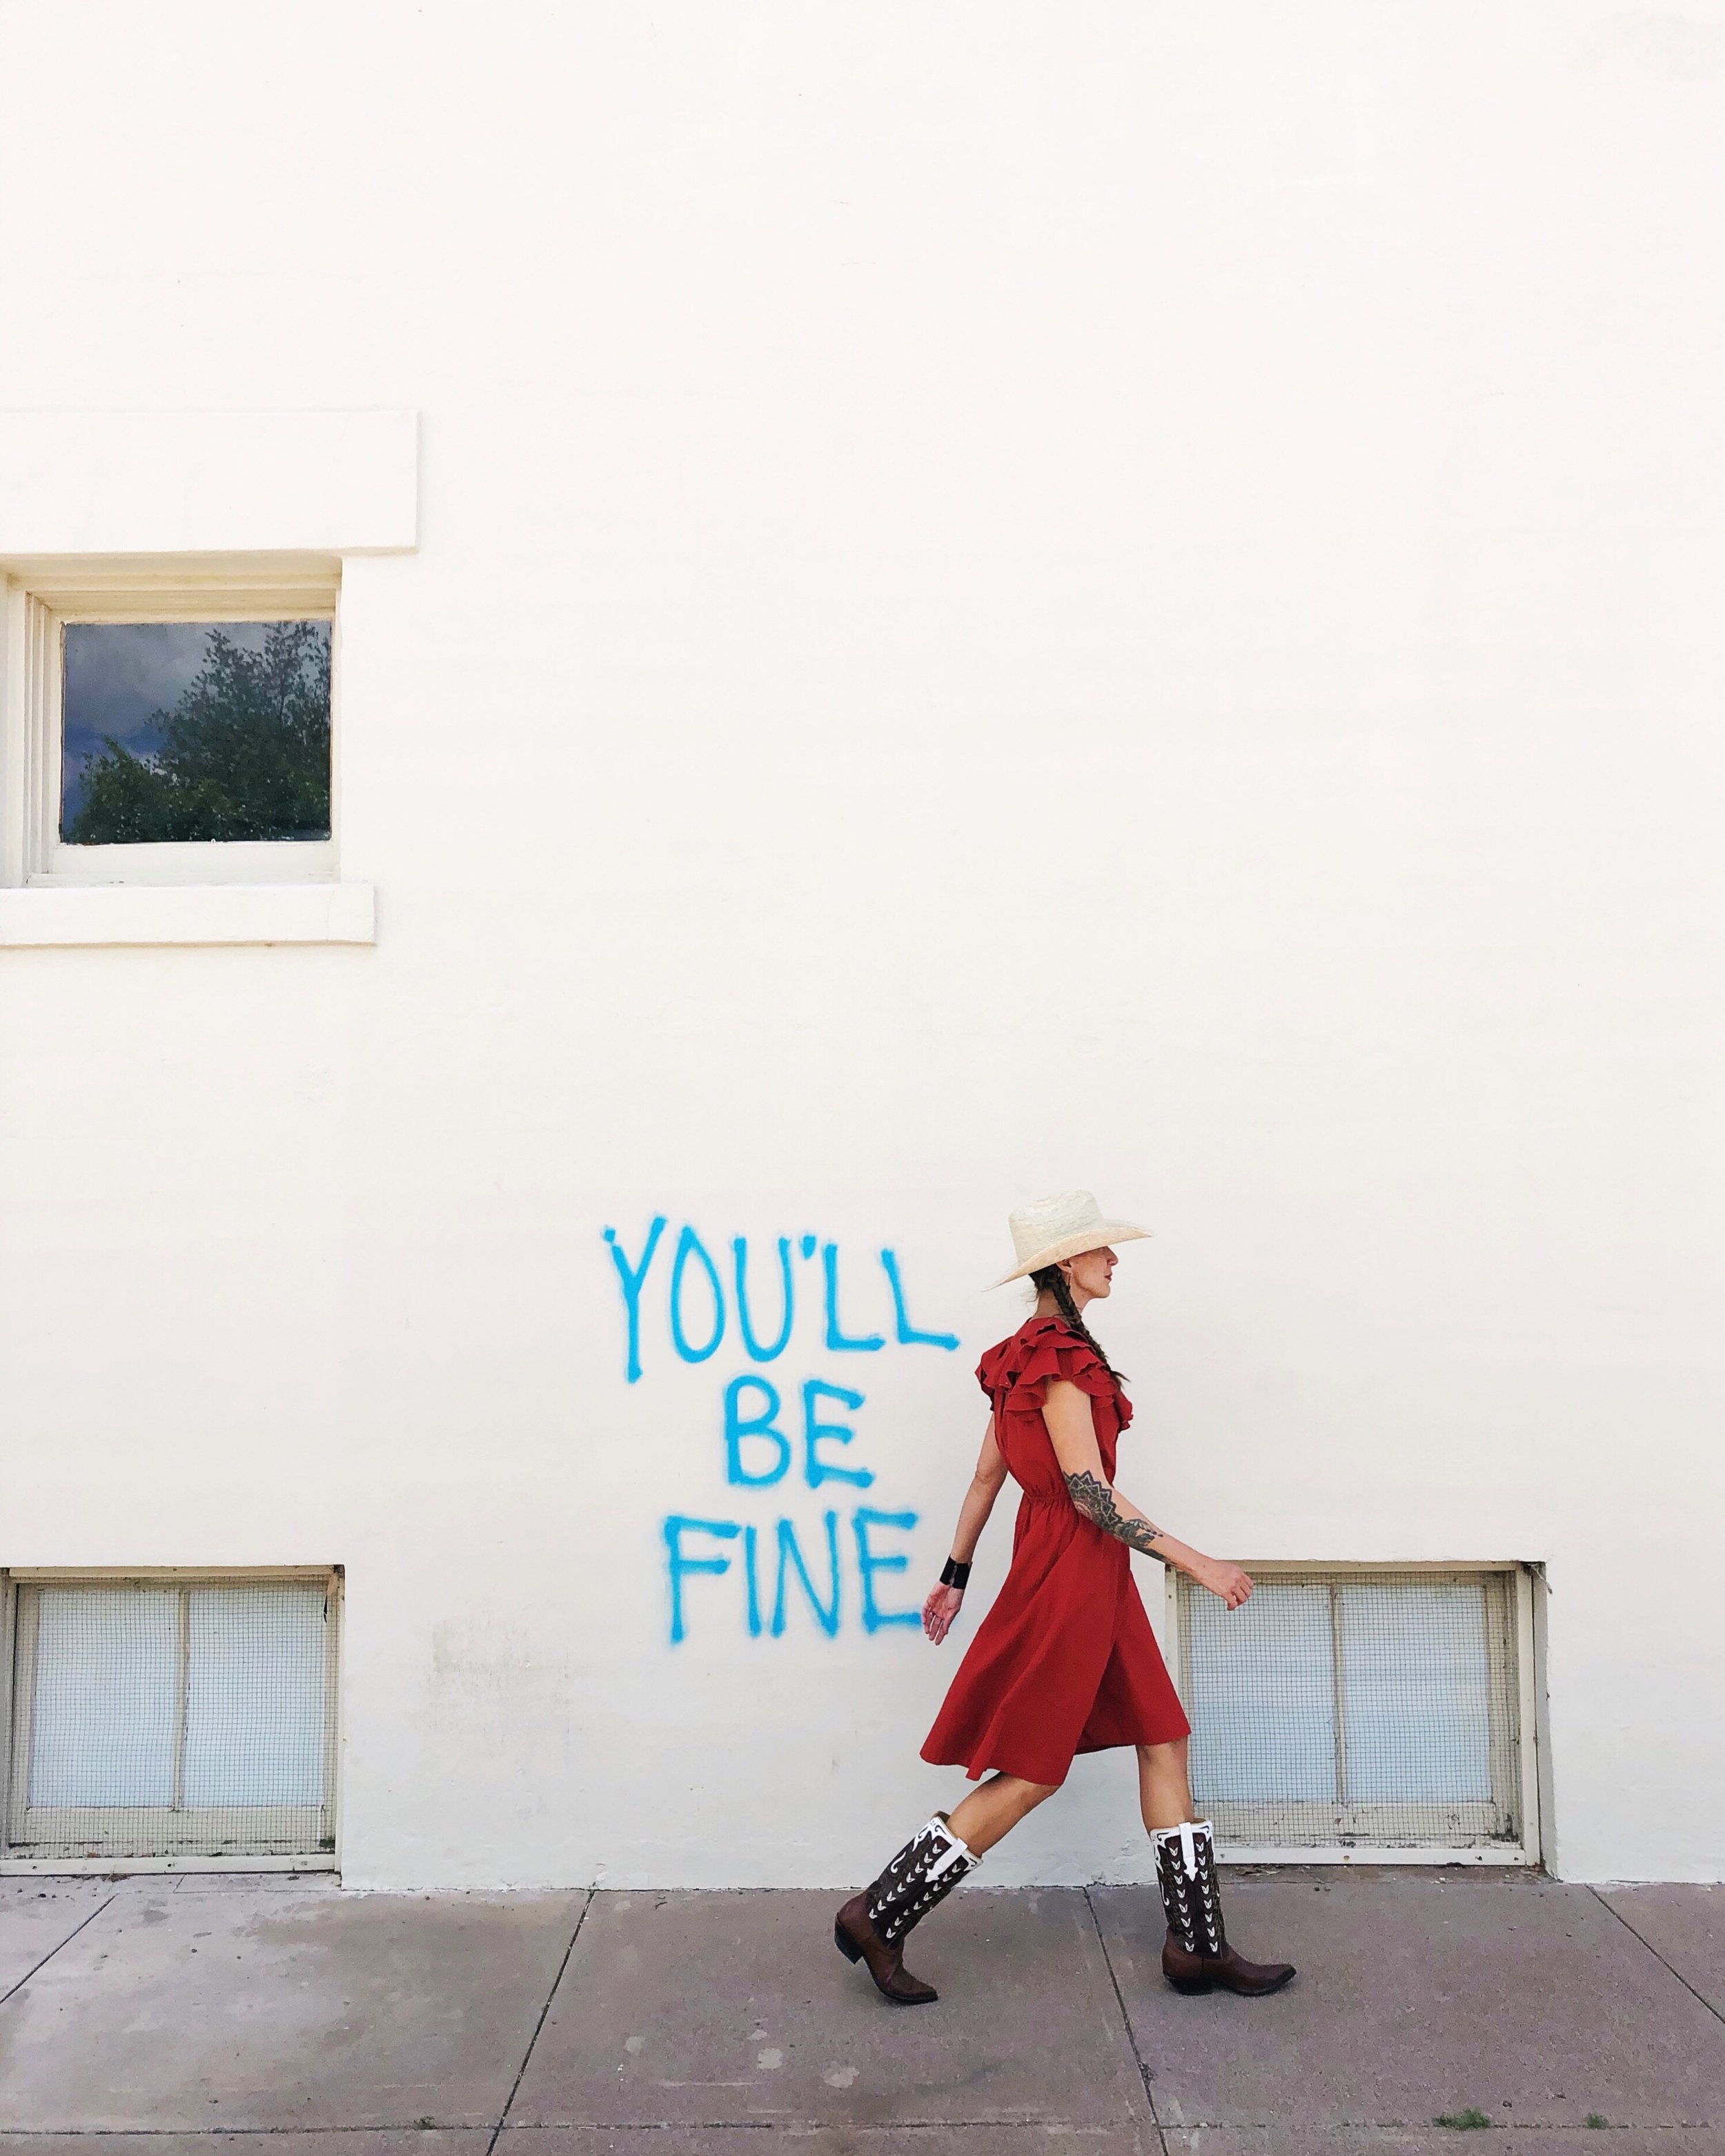
5. FILL THE FRAME
If the main subject of your photo doesn’t stand out clearly enough against its surroundings, it will lack oomph. One simple way to avoid that is to fill the frame with your subject. This means getting closer so all of the surrounding background is eliminated, making your photos more impactful and intimate. Cutting out unnecessary background detail ensures the subject gets the full attention of the viewer. It also captures more detail and can create some really unique and abstract images.

6. COLOR
Color is another easy way to give your photos more oomph. You can choose to include one or several bold and striking colors to make your subjects stand out. Or you can go for pastel shades for light and airy visuals, or even shades of one color for soothing simplicity. Complementary colors are also great for creating a stunning and well-balanced image; try using a color wheel for help. You may also want to play with color to create interesting images or you can use certain shades to evoke various emotions, such as happiness with bright yellows or pinks and mystery with darker hues.

7. LOOK FOR PATTERNS, TEXTURES, AND SYMMETRY
The human eye has a natural tendency to pick up on patterns, repetition, symmetry, and showcasing geometric shapes or interesting textures can be a very alluring way to pull the viewer in.
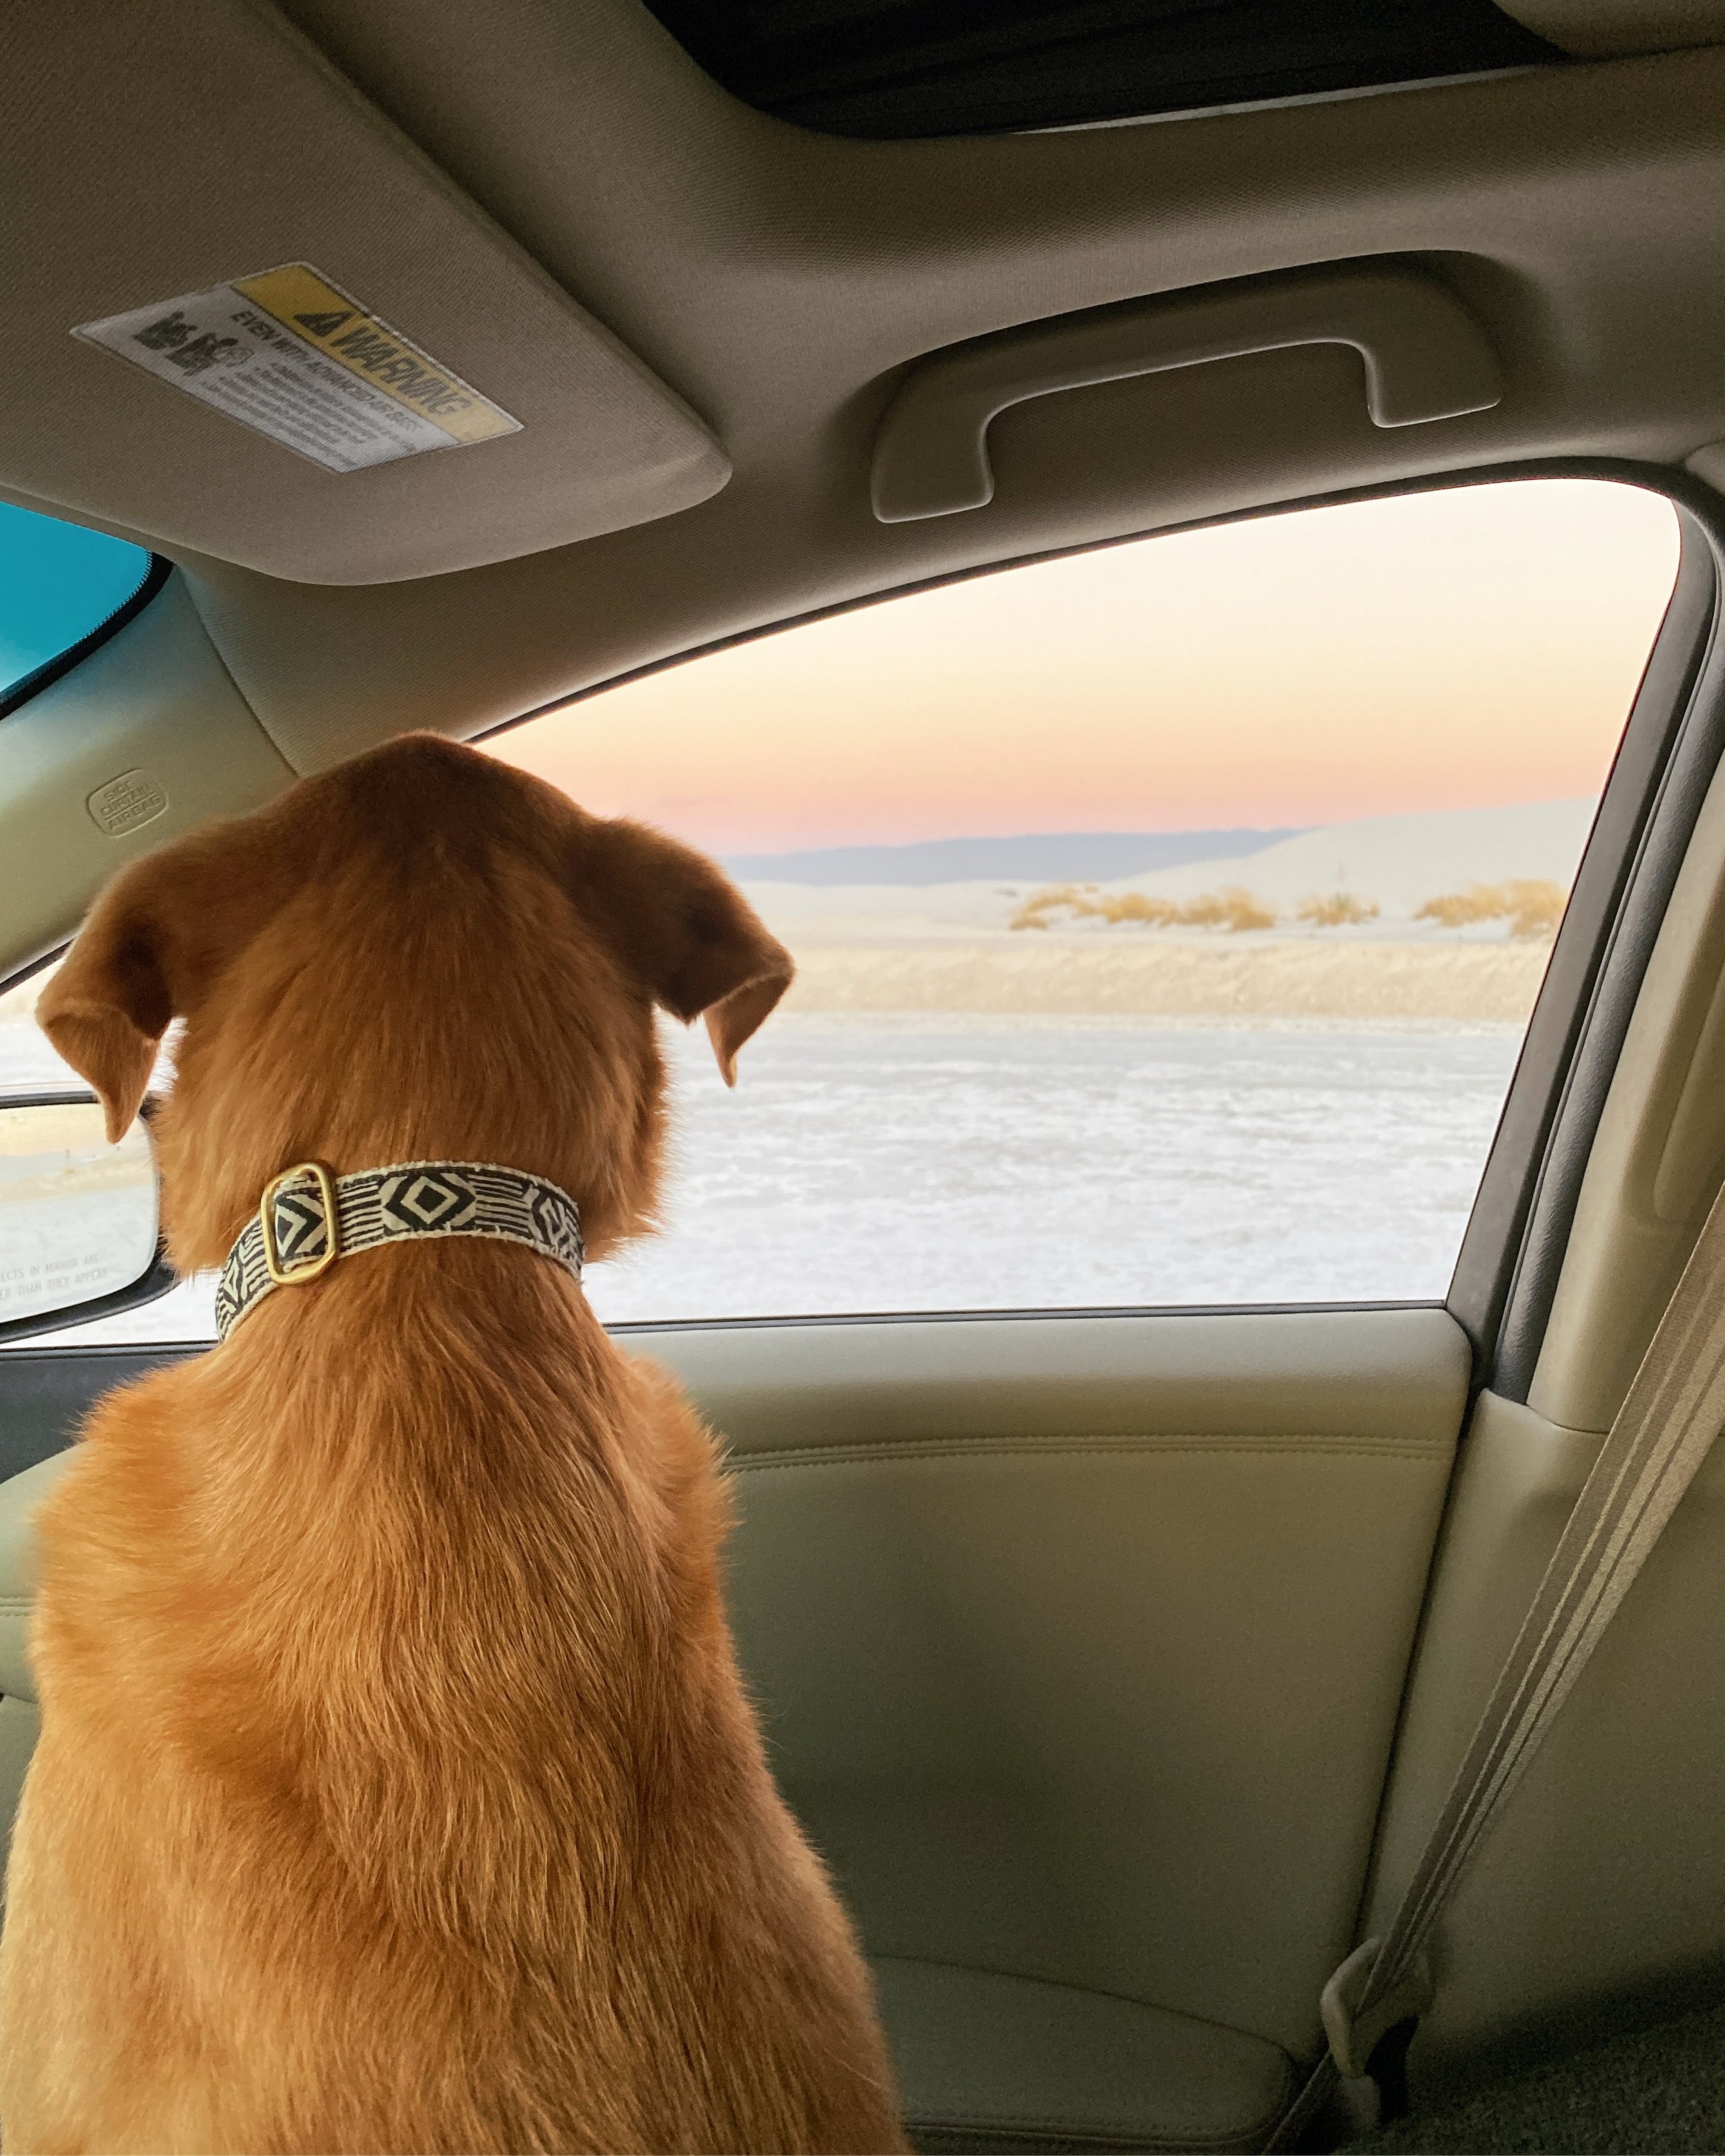
8. FRAMING
Framing is just like it sound. Using objects in the foreground, or the part of the image closest to you, you’ll create a “frame” around the main subject and drawing the eye towards it. As well as creating more visual interest, framing adds meaning to a photo as it puts the main subject in context with its surroundings.

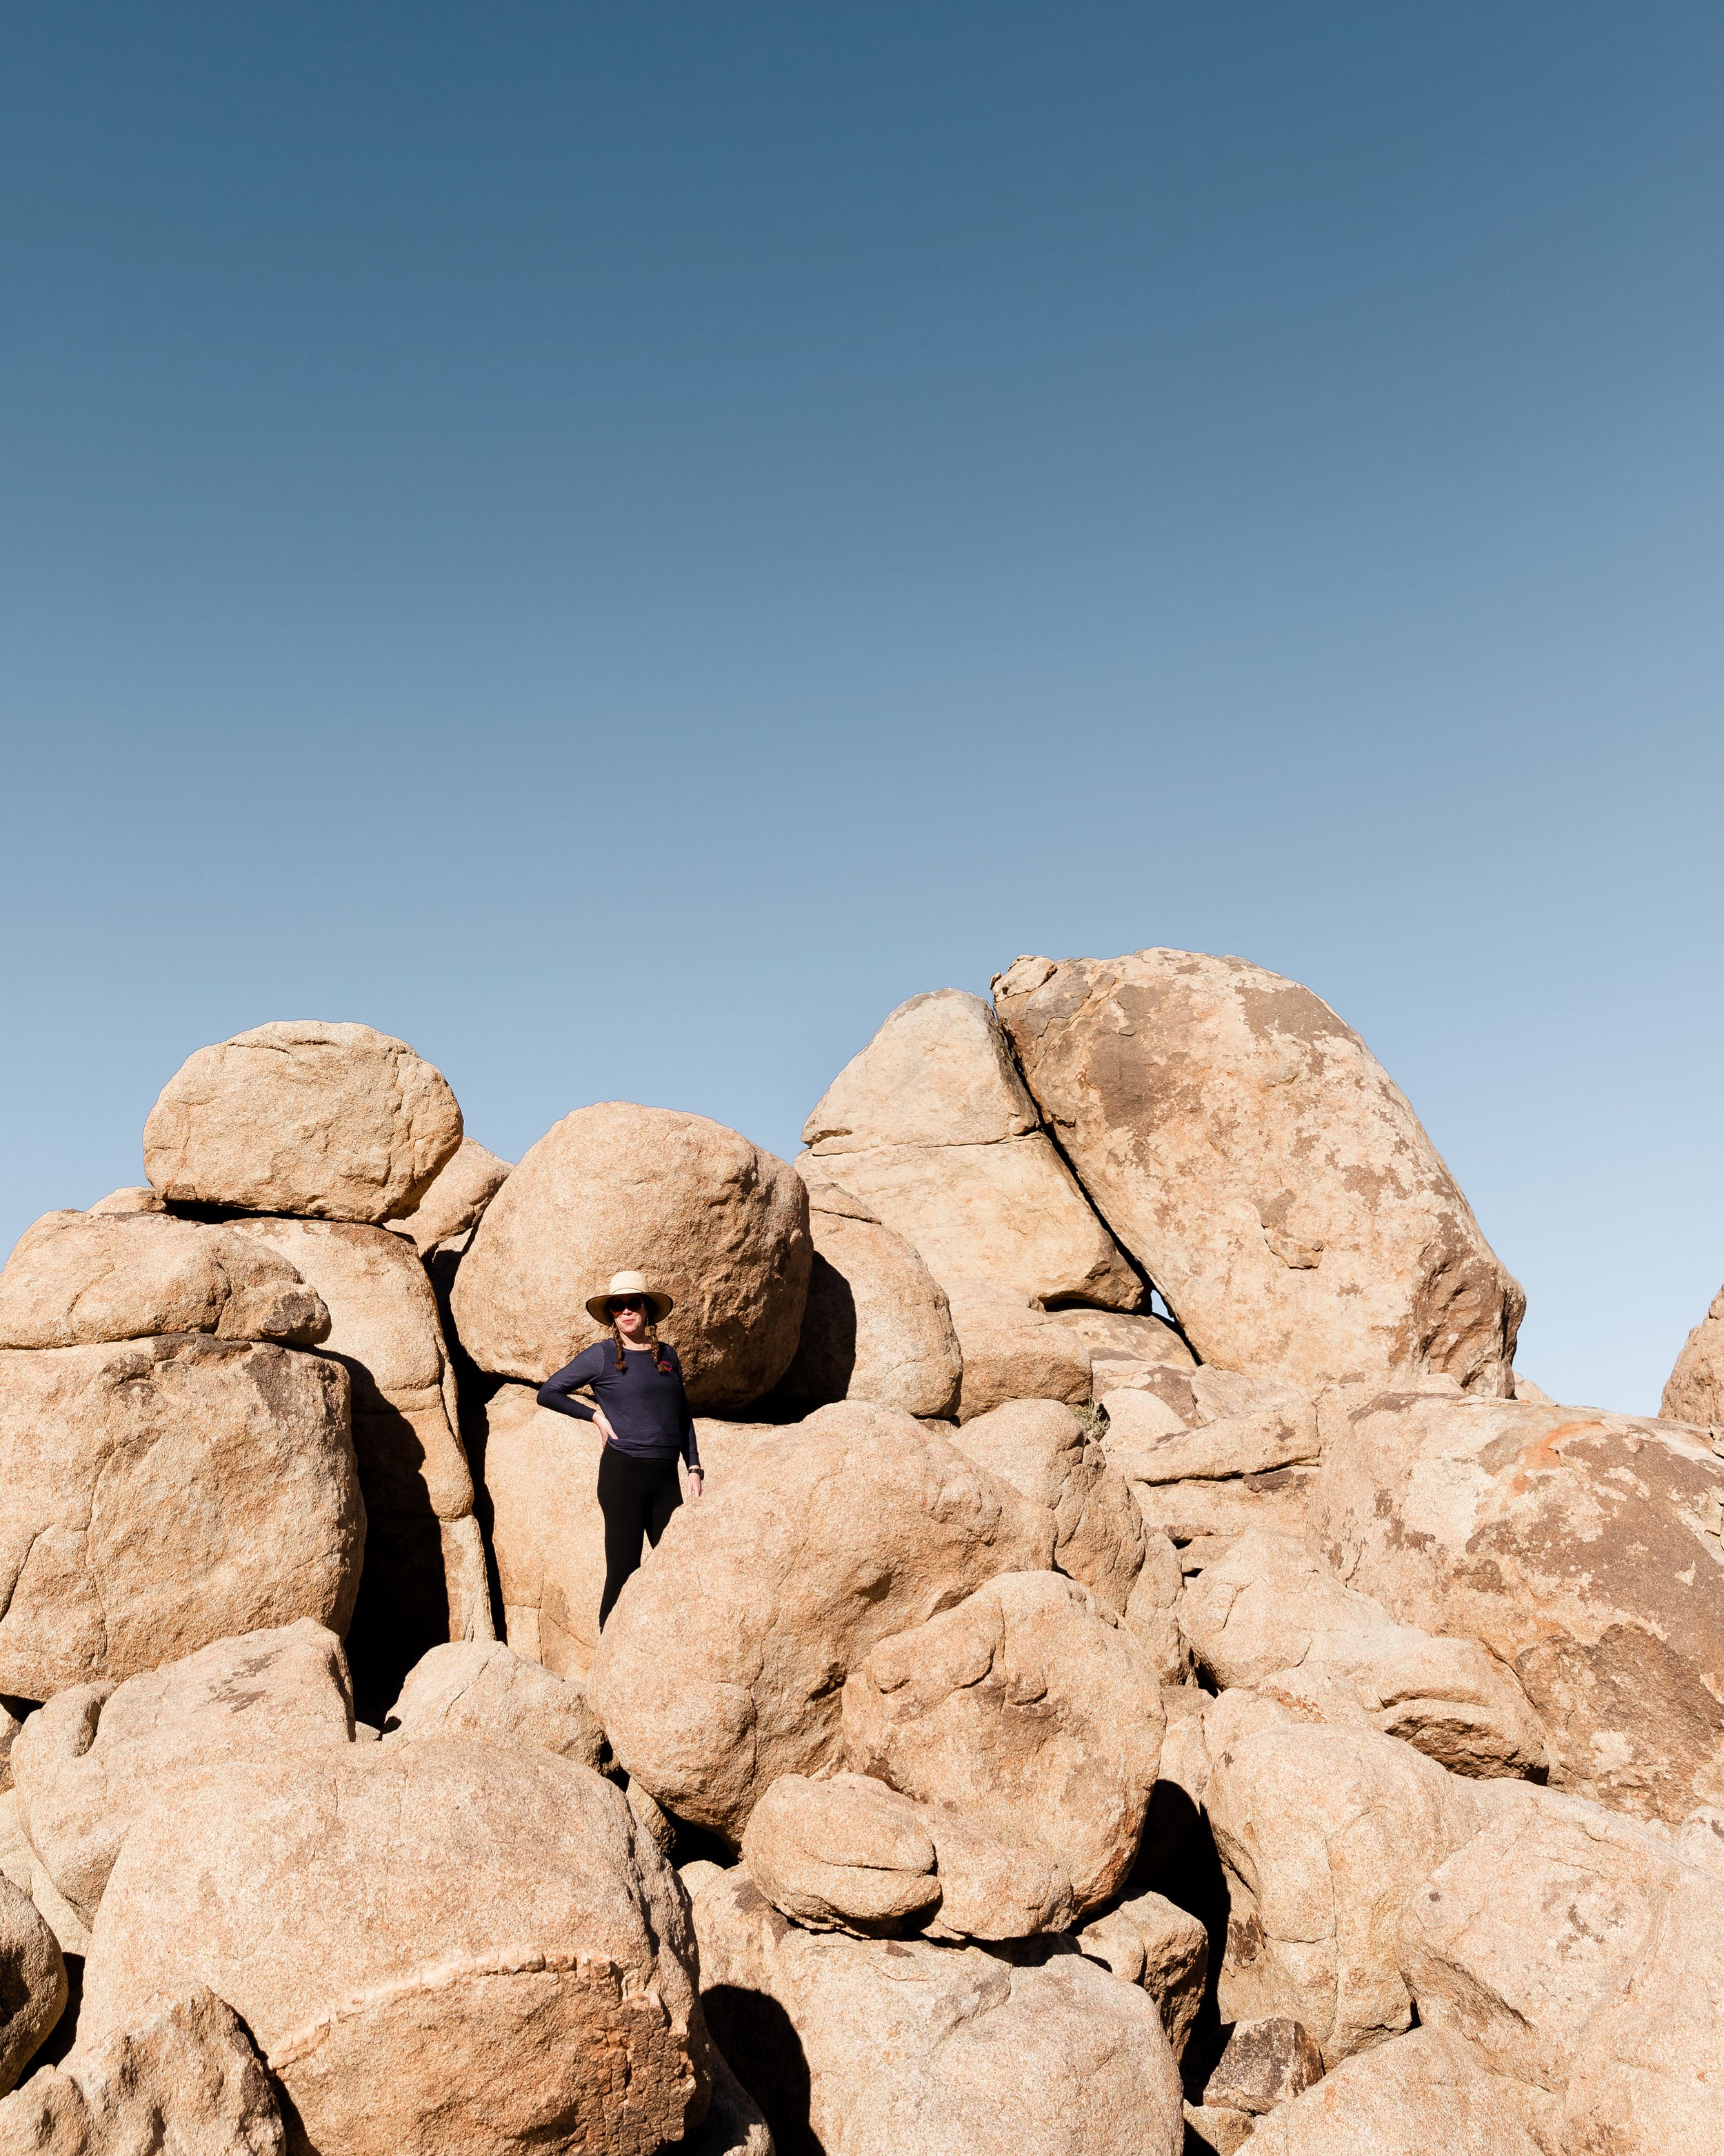
9. MINIMALISM + NEGATIVE SPACE
Many times the simplest photos turn out to be my favorite. Minimalism in your images can help to give the viewer a singular point of focus on your subject. Often this means a simple and uncluttered background, which is a great tactic to use in portraiture. Another way to achieve minimalism is through the use of Negative Space, which put simply, is the space around the object itself that helps define the positive space or main focus of the image.
10. BREAK THE RULES + HAVE FUN
Photography is an art, not a science. No matter what I said above, there are no strict rules about what you can and cannot do in photography, instead just guidelines and tips. While they often prove useful in many situations, don’t let them restrict your creativity. If they don’t work in your image, ignore them, experiment, and have fun. But to break the rules you must learn them first. So, study the techniques covered above, practice them until they are second nature, then start breaking the rules and see what happens!
Interested in your own photography session with me?